|
Binoculars I shoot in a variety of locations with some locations having no need for binoculars. Still, I find them to be a critical piece of equipment when scouting and sighting wildlife. When I scout from my vehicle it is far too difficult to swing around a 600mm lens with hood between me and the steering wheel. I do not have a super fancy pair of binoculars. I suppose it is up to the individual how much they want to invest. For the purpose I use them for, I was happy with a pair under $100. I use the Bushnell 13-1056 10x50mm. I like the quick focus, rubberized coating, and they serve the purpose of sighting and identifying wildlife. 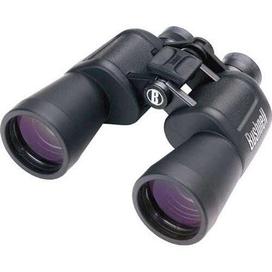
Camera Body Choosing a camera body seems to be a constant debate amongst some photographers. What brand? Full frame or crop sensor? Entry level, semi-pro, or pro? The list of questions seems endless. For the sake of avoiding argument, choose a camera that makes sense to you, meets your needs, and aligns with your budget. I am sharing my choice with you as a point of reference. I often shoot with two camera bodies when photographing wildlife. A huge reason is that I use prime telephoto lenses, which I will talk about shortly. 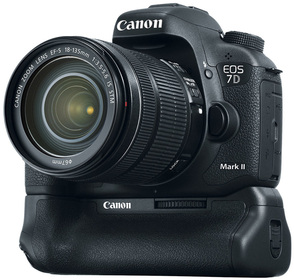
My primary camera body is the Canon EOS 7D Mark II. It is a crop sensor camera which helps me get that little extra reach via the 1.6 crop factor. Some of the key features why I chose this camera for wildlife are: • 1.6 crop factor from the crop sensor • Cleaner high ISO’s compared to many crop sensor bodies • 65-Point All Cross-Type Phase Detect Auto Focus (AF) • Dual DIGIC 6 Image Processors • Large variety of continuous focus (AI Servo) configurations and adjustments for shooting action • 10 frames per second at Full Resolution My secondary camera body is the Canon EOS 7D which is not as feature rich but has produced hundreds of quality images for me through the years. It too is a crop sensor camera and has some nice AF features. 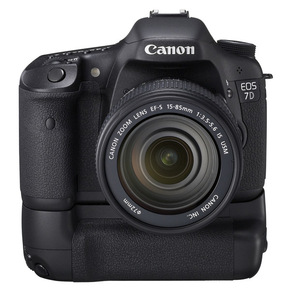
I know some photographers are torn between full frame and crop sensor bodies based on high ISO image quality. I say, make your choice and get out there and shoot. Telephoto Lens Yet another piece of equipment that can pose a debate – telephoto prime or telephoto zoom? I don’t think there is any wrong answer. Again much depends on what makes sense to you, meets your needs, and aligns with your budget. For wildlife photography I primarily use telephoto prime lenses. What does prime mean? A “prime” is a lens that has a fixed focal length, let’s say 400mm. The lens does not zoom in and out; it is always at 400mm. I use two different size prime lenses for wildlife photography. My primary wildlife lens is the Canon EF 600mm f/4 L IS USM. My lens is the first version. Canon is now releasing second version of many of their popular lenses. 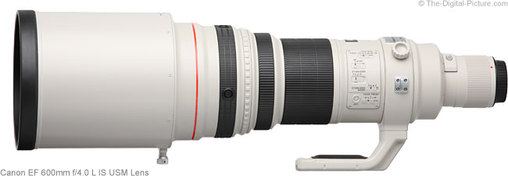
Combined with the 7D Mk II, the EF 600mm provides me with 960mm of focal length power. How so? 600mm x 1.6 crop factor = 960mm of focal length power There are times I would like and/or need a bit more focal length. Then I add the Canon EF 1.4x II Teleconverter. This increases my focal length by 1.4x’s. So what does that mean? 600mm x 1.6 crop factor x 1.4x teleconverter = 1344mm of focal length power This kind of focal length can prove to be helpful when your subject is far away, or you have good reason to stay far away….like bears, wolves, and rutting elk. My secondary wildlife lens is the Canon EF 400mm f/5.6 L USM. This lens is rather light, extremely crisp, and very fast with auto focus. This lens was once my primary wildlife lens and has produces hundreds and hundreds of great images for me. 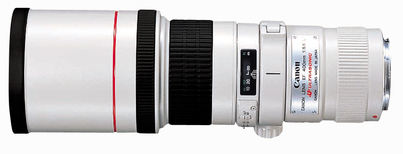
If you are just starting out with wildlife photography, my advice is to invest in a telephoto lens no smaller than 300mm. Now days there are several choices to help you obtain higher focal lengths like 500mm and 600mm. It all comes down to your needs and budget. Tripod As I write this I am beginning to realize there is a lot of photography equipment that people debate about. A set of tripod legs also falls into the debate category. Hello. My name is Scott and I use a tripod. :-) For me, a tripod is the surest bet of having a stable lens that helps produce quality images. Don’t get me wrong, handheld shooting and image stabilization has its time of usefulness. I use a tripod 95% of the time. It is just what I do. I have two sets of tripod legs. Both are of what I would consider a higher quality but they did not break my budget. Given the gear on my tripods cost in the thousands, I did want to make sure the tripod could provide me the confidence my gear will be supported and safe. My primary tripod legs used with the 600mm lens is the Vanguard Auctus Plus 324AT. The legs are aluminum and a bit heavy at nearly 8lbs. Considering my 600mm is nearly 13lbs on its own, I am good with having a heavier tripod. 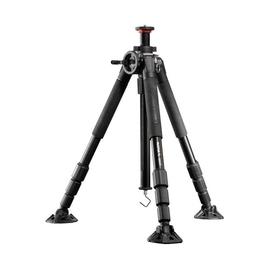
The second set of legs is the Giottos MT-9371. These legs are also aluminum, are a bit lighter, but can still handle the 600mm. The Vanguard has some features over the Giottos that I liked and that’s why I purchased the Vanguard. 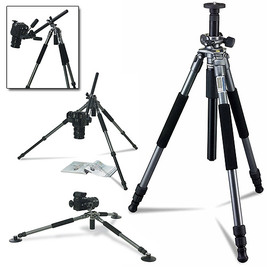
Tripod Head There are a number of different choices when it comes to tripod heads. There are those better suited for video, there are trigger style heads, ball heads, monopod heads, and gimbal heads. Each has a slight advantage over the other, depending on application. I have two head setups for wildlife photography. Both have gimbal action, meaning a head with pivoting points for smooth vertical and horizontal action. My primary tripod head is the Wimberley WH-101 Gimbal Head. This is a straight up gimbal head that supports my 600mm with ease and provides fluid vertical and horizontal motion, making birds in flight shots a little easier. 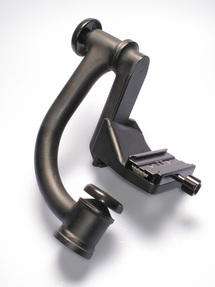
My second tripod head setup is lighter, a bit more diverse, yet also provides gimbal movement. The ball head is a Giottos MH-3300. In combination with it, I use an Induro GHBA Gimbal attachment. This is really a very diverse setup. 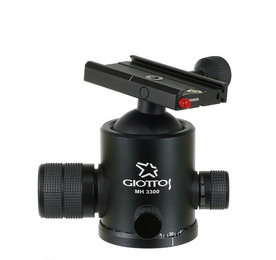
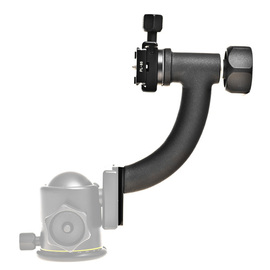
When using the 400mm I will most often use the ball head and gimbal attachment combination. If I want or need to switch to a smaller lens, let’s say a wide angle lens, I can disconnect the gimbal attachment and use the ball head for a landscape or portrait shot. Bean Bag Support Whether you are photographing a Great Blue Heron or an Plains Bison, there are times when staying in your vehicle is the best choice and your best blind. Using a tripod in your vehicle would be awkward and not advised…although I have seen it done. 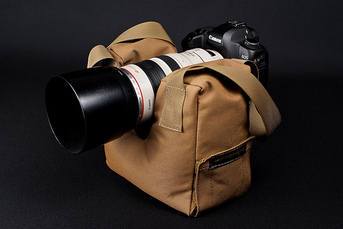
The best support option in your vehicle is a bean bag. I use the XL Bean Bag from The Vest Guy. It is filled with buckwheat hulls, lightweight, and provides great support when shooting from my vehicle, over the hood, or over the roof of my vehicle. When selecting a bean bag my recommendation is to go with a larger one. It will give you more options and more practical support. Camera Bag, Case, or Backpack I have been through what seems countless camera bags. Much like a tripod and tripod head, a camera bag is a real personal choice. There is no “right” bag other than the one that you deem right for you. I have found some backpack options that allow me to pack all my gear into two bags and be able to through them over my shoulder if need be. Of course I cannot carry both bags as backpacks in the field but I have found I prefer backpacks over camera bags and cases. I have one backpack that holds my Canon 7D Mk II and EF 600mm while connected to one another. The Lowepro Lens Trekker 600 AW has made it easy to keep my camera body and lens connected and readily available for shooting. 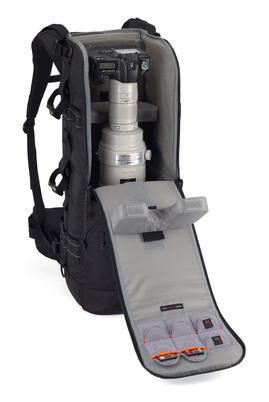
All my other gear such as the 7D, 400mm lens, wide angle lens, ultra-wide lens, and a variety of camera accessories, including a small this tool bag, all fits in my Lowepro Vertex 300 AW Backpack. 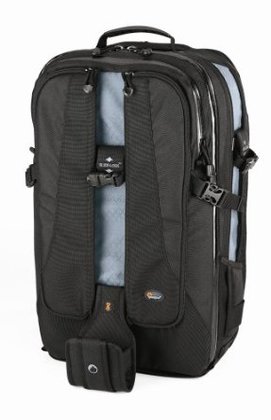
Lens Rain/Snow Cover I am not a fair weather shooter. I have been in the rain, sleet, and snow. Only in extremely poor weather conditions will I not shoot. With that said, it is imperative you protect your gear. Sure your lens and camera may be weather sealed. For a small price I like the comfort of knowing I am taking extra measure to ensure water and moisture stays off my camera body and lens. I use the RainCoat by LensCoat. There are a couple of sizes. I have one for my 400mm setup and a larger one for my 600mm set up. I have used these covers and rain and snow. The water sheds right off the cover making me feel much better about protecting my gear. 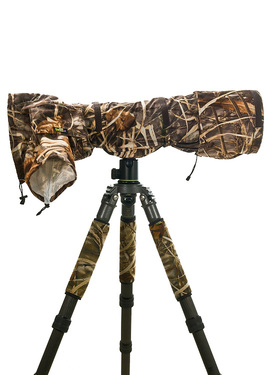
That’s about it for the listing, of what I consider essential gear for wildlife photography. Sure there is probably other camera gear to consider, and we didn’t even touch on clothing and boots. I think I will leave that for another time.
One may look at this list and say, how much is it going to cost me for all this stuff? Well, to some degree that is up to you. In some aspects of my growth in photography gear I have purchased certain pieces multiple times. In example, I have own eight different ball heads. It can really get costly buying the same device over and over. At the same time, sometimes your budget limits your ability to invest in that “one” ball head so you will never have to buy another again. If you don’t already have some of this gear listed, use this listing as a guide and tool. Please don’t fall to the pressure of feeling you can’t take a photo of a bird without spending thousands of dollars. The specific items within this list are my choices. You need to make your choices and when you are done….get out there and shoot!! Happy Clickin!!!
1 Comment
|
Author:
|
 RSS Feed